
Do you love the look of wall moulding but don’t want to bite off the expense or don’t know where to begin on your own? Consider this your motivation to get started and create the rooms of your dreams at a low cost.
In all of my late night Instagram scrolling, I was always be drawn to homes with intricate wall moulding and various trim styles. I had confidence I could do something similar but with so many options for different trim sizes, trim detail, shapes, and heights, it quickly became too overwhelming. Plus, everyone in those videos were using power tools, which I did not have so I would quickly move on.


After staring at white blank walls in my home for 2 years, I finally decided there was no harm in trying. What’s the worst that could happen? I’d mess up and could texture and repaint the area so I went for it. I’m now hooked and as I keep starting new projects, my husband always asks me if EVERY room in our home needs wall mouldings (or as he calls it, “wood on the walls”)….umm, yes!!!!
So start planning and get going! You won’t look back.
Plan a Design
Draw out a design on paper or tape out your design with painters tape . Focus on a feature wall for your first project such as the main view of a dining room or the wall behind a bed. Starting with squares or rectangle shapes is certainly the easier approach vs triangles (for example, along stairs). There’s no hard rules in the trim game but here are some general guidelines.

- Chair rails: Chair rails are often installed at about 32 to 36 inches above the floor or about 1/3 of the way up the wall.
- Wainscoting: The typical height for wainscoting is around 32 to 42 inches. In more formal spaces or traditional designs, wainscoting can go higher, up to 48 to 54 inches.
- Room Proportions: A general guideline for moulding height is to keep the proportions of moulding consistent with the room’s scale. Taller moulding tends to look better in larger, more open rooms or in rooms with higher ceilings.
- Style Consistency: Try to match the style of moulding to the overall design of the room. For example, more intricate, detailed moulding works well in formal or classical spaces, while simpler, streamlined moulding is better for modern or minimalist rooms.
I ultimately decided to keep to one box under the chair rail for a simpler look–I thought too many boxes along this one stair wall would look too busy.
Once you have your design in mind, this wainscoting layout calculator is an incredible tool and will save you so much time. All you have to do is add in your wall dimensions and select how many panels you want and it will do all of the calculations for you. Bookmark this!
Tools & Supplies
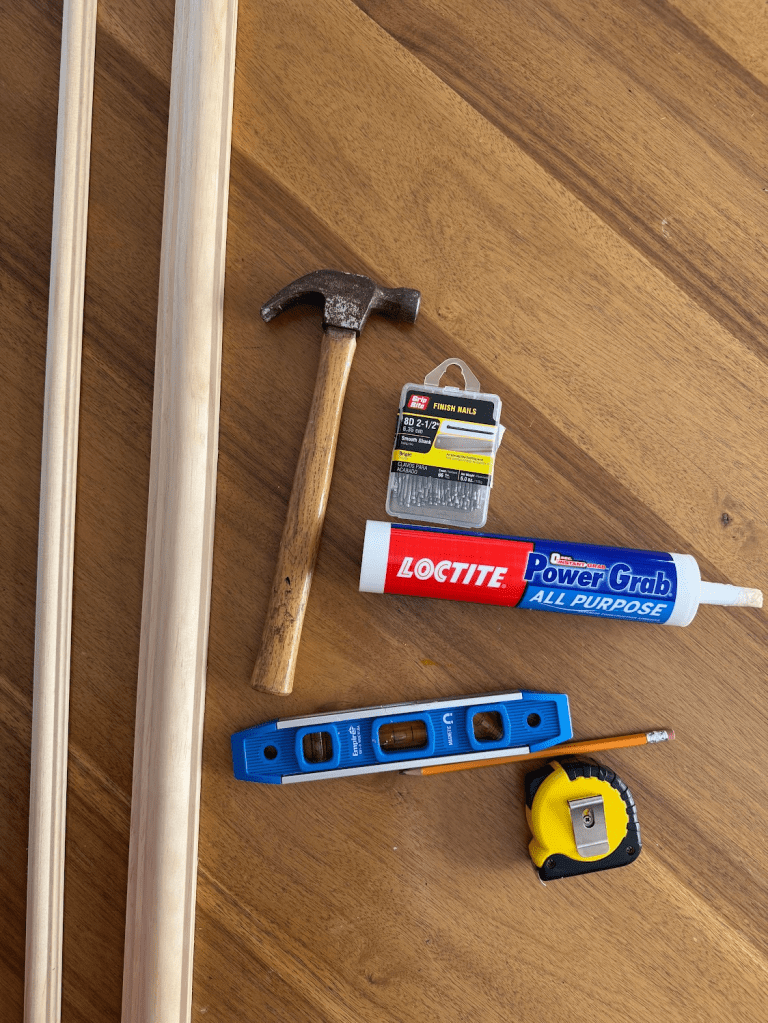
For beginners, no power tools are required. You’ll need the following:
- The first thing I invested in (less than a $20 investment) was a miter box kit. There was no way at the time I was going to spend hundreds of dollars on a miter saw for an experimental project. The kit comes with a box with different angle cut options and the saw.
- Trim of choice. The next step, which seemed like the most daunting at the time, was going to the hardware store lumber section. Home Depot is my preferences. I had an idea of the trim style I wanted–picture moulding on the bottom and a thicker chair rail to top it off–but soon realized there are no hard rules with wall trim. Go walk the wall moulding aisle, pick the style of trim that suites your project and just go with it!
- For the top piece/chair rail, I used the DecraMold 9/16 in. x 1-3/16 in. x 96 in. solid pine.
- For the square picture molding, I used a thinner DecraMold 5/16 in. x 7/8 in. x 96 in. Unfinished Panel Moulding.
- Construction grade adhesive , which will allow you to glue the trim pieces to the wall and skip the nails.
- For larger, heavier pieces of trim, you’ll want to use a hammer & trim nails. A general rule of thumb is to use a nail that is 3x the depth of the trim. 2″ nails has usually worked for all of my projects so far.
- Level (both a 9 in level for vertical and a 48 in if doing longer horizontal pieces)
- You can also use a laser level, but I suggest to keeping to a level, which you may already own for your first projects until you know you are committed to doing more projects later. I use the Bosch self-leveling cross-line laser.
- Tape measure
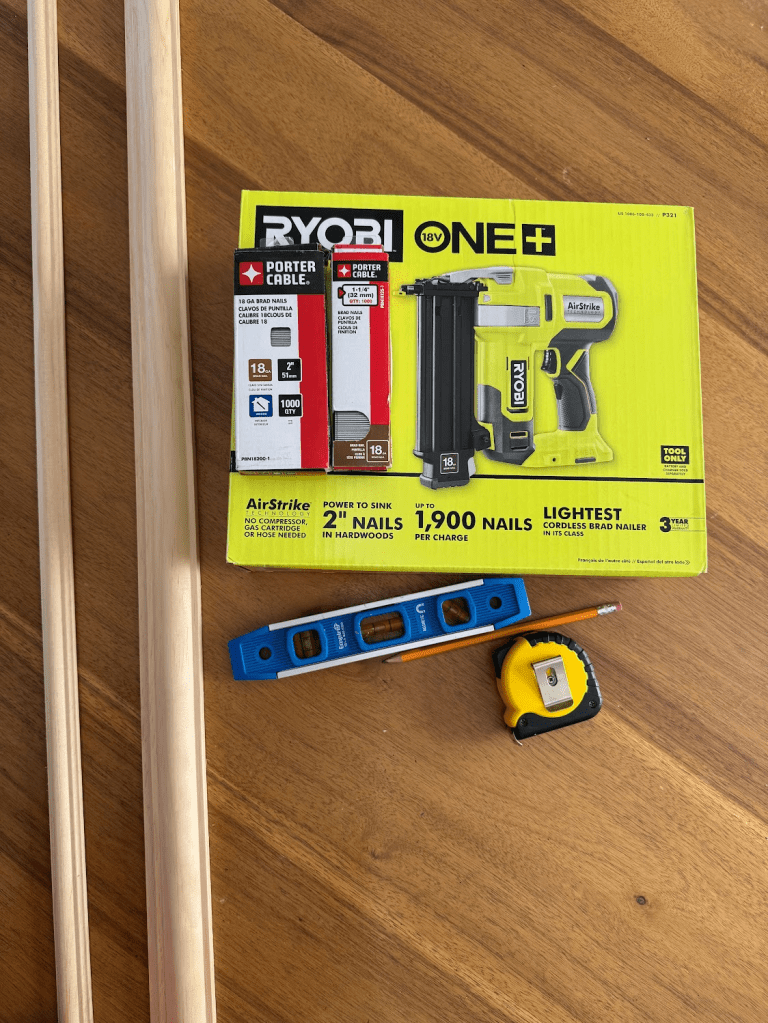
For those that are up for power tools, I recently started using the Ryobi cordless brad nailer. (I already had the batteries otherwise you’ll need to purchase the version that includes the battery & charger.) It was a game changer in helping speed up projects but again, not required if you want to dabble before making the investment.
Installation
- When working with square & rectangle shapes, all of your cuts will be 45 degree angles and the mitre box kit will make it easy to identify and cut along the angle. Pre-cut your boards to the designated heights and widths.
- If using thinner and lighter trim, the construction-grade adhesive usually does the trick. Press on it for about 30 seconds after application–you can move it around a bit after to get the perfect meeting of the trim pieces.
- When installing thicker, longer and/or heavier trim like a chair rail, I suggest you use both the adhesive glue and hammer in the finishing nails every 16 inches.
- Use wood filler where trim pieces meet to make it look like a consistent piece of wood.
- Sand to make smooth once the wood filler is dry or can use a baby wipe to smooth when still wet.
- Caulk where the trim meets the wall.
- Paint to your desired color. Most often the trim is painted the same color as the wall for a color drenched look but for wainscoting that has a chair rail or starting point, everything from the chair rail below (including the wall) can be painted a different color.
I did an overview video of the main steps posted on my Instagram account here:
//www.instagram.com/embed.js


Key Takeaways
-Plan out your design
-Pre-measure your cuts
-Get your supplies-don’t let a lack of power tools stop you.
-Use wood filler to fill gaps
-Caulk where trim meets the wall
-Paint to match the wall color or can paint the chair rail and everything below a feature color.
-Get going!
Once I tackled my first project, I quickly realized the options for different style applications were endless. Check out other projects I’ve done below, including wall paneling, board and batten in my daughter’s room

One Comment Add yours